Tag Archives: LLED462

Use of Web 2.0 Tools in the Classroom: A Reflection

Reflection

When thinking about my choices for this Assignment, my first thought was to look at Web 2.0 tools.  However, as the time drew nearer to actually start the assignment I hesitated.  I found the idea of creating with online tools to be intimidating, as I have almost zero experience with Web 2.0 technology.  I thought maybe it would be better to create a blog and review some educational papers instead.  I could do that.  However, I wanted to challenge myself so I decided to stick with my original plan and explore how Web 2.0 tools can be used in education to enhance student learning.  I am very glad I did.

Throughout my exploration of Web 2.0 tools I found many teachers and classrooms using them.  However, my experience as a teacher and TOC is that using Web 2.0 tools in the classroom is not yet very common.  This may be due to the fact many teachers are unfamiliar with these technologies and are unsure about the safety issues regarding their use in the classroom (Schuck, Aubusson & Kearney, 2010).  As well, Web 2.0 tools offer a different way of teaching and learning with the “expert giving way to the collaborator” (Hargadon, 2008).  I think many teachers are not comfortable yet giving up their role as expert, to learn alongside with their students.

Many of the tools I tried were fairly easy to figure out.  There were a few frustrations getting started, but most sites had good help videos for beginners.  For those that didn’t, I discovered instructions could easily be found elsewhere (usually YouTube videos).  However, except for Popplet, I kept forgetting to utilize outside resources until after I had a particular tool figured out.

One challenge I faced when creating with Web 2.0 tools is attribution.  We, as teachers, are constantly telling our students they need to give credit for information, images, audio or whatever else they find and use no matter what the medium.  When working with many of these tools I noticed there was no way to easily give credit for the information I used.  Glogster and Popplet allowed me to choose images from Flickr, but didn’t give any information about their origins.  Do I assume they are “free” to use and don’t require attribution?  The pictures I used for my Animoto are part of the public domain, but I could have used others that were not.    Information sharing has become so widespread on the Internet, it is easy for students to feel they can use whatever is there for their own purposes, and many Web 2.0 tools let them do this easily.  It is now more important than ever that students learn and understand plagiarism, copyright and Creative Commons licenses.

British Columbia’s Education Plan calls for “learning empowered by technology” (BC Ministry of Education, 2012).  It encourages the use of technology in classrooms to better prepare students for life in a digital world (BC Ministry of Education, 2012).  However, experience and interest of teachers is often the driving force behind how technology is used in classroom, not the curriculum (Beaudry, 2005).  BC’s Education Plan promises support for teachers in acquiring the knowledge of how to use technology to benefit their students (BC Ministry of Education, 2012) and teacher-librarians can be a part of that support.  Teacher-librarians have become leaders in their schools in teaching information literacy and technology skills to both teachers and students (Beaudry, 2005).  Exploring Web 2.0 technology for this assignment has given me more confidence to assume this leadership role.

Creating with Web 2.0 tools has increased my comfort level in working with online technology.  Teacher-librarians need to have an understanding about all the resources available for students and teachers to use, and technology resources was one area where my confidence was lacking.  This assignment has changed my outlook from apprehension to being interested to explore more.  As a teacher-librarian, I now plan on using technology and education blogs and other websites to learn about new tools and how they can be used in education.  Passing on this knowledge to students and teachers will be part of my role.  I think the challenge will be to decide which tools to learn and to ensure the technology I choose is appropriate and will contribute to student learning in a positive way.  I don’t think using technology for the sake of technology benefits students.  The technology itself would become the focus instead of the content it is trying to explain or display.  Another challenge may be getting teachers to try the online tools I find for them.  Though most teachers use technology in their personal lives, they often don’t use it in the classroom with their students (Beaudry, 2005).  I will have to demonstrate how technology in the classroom can benefit themselves and their students.  I am now looking forward to these challenges in my future role as a teacher-librarian.

Beaudry, R. (2005). Exploring online learning resources. In R. Doiron & M. Asselin (Eds.), Literacy, libraries and learning (pp 81-96). Markham, Ontario: Pembroke Publishers.


BC Ministry of Education. (2012). BC’s education plan. Government of British Columbia. Retrieved from http://www.bcedplan.ca/assets/pdf/bc_edu_plan.pdf


Hargadon, S. (2008, March 4). [Web log message]. Retrieved from http://www.stevehargadon.com/2008/03/web-20-is-future-of-education.html


Schuck, S., Aubusson, P., & Kearney, M. (2010). Web 2.0 in the classroom?  Dilemmas and opportunities inherent in adolescent web 2.0 engagement, Contemporary Issues in Technology and Teacher Education, 10(2), 234-246. Retrieved from http://editlib.org/d/31422


Leave a comment

Filed under LLED462

Blogging with Kidblog

Finding the 10th Web 2.0 tool for this assignment seemed to be the hardest.  VoiceThread was a choice from our assignment outline, but looking at the tool and how teachers are able to use it, I personally didn’t think it was an excellent site.  I didn’t want to use a tool for the sake of using technology in the classroom, which is what I felt I would be doing by creating with VoiceThread.  I continued to look at tools from ReadWriteThink, Teaching History with Technology and other websites, but I couldn’t seem to find one that fit with my Science 9 Space Exploration Unit.  I suppose I could have used a different subject for this last tool, but I wanted to be consistent.  I almost decided to do something with VoiceThread when I started thinking about the purpose of using online tools with our students.


So far all the tools I have chosen have been to help students with their research, studying or presenting their learning.  Connecting students with technology by giving them tools to increase their interest and creativity with what they are learning is another purpose of using Web 2.0 tools in the classroom.  However, a large part of the way students use technology is social media.  Through social media, students have discovered how easy it is to share information online.  In order to become good digital citizens they need to be taught how to use this technology responsibly, and as is often the case it has fallen to teachers to teach this to their students.  I believe it is important to not only use tools with students that will enhance their learning, but will also give them skills they will need for their lives outside the classroom.


Blogs have become a significant way to share information over the Internet.  In researching Web 2.0 tools for this assignment, much of the information I found came from blogs.  As it is highly likely that at some point in their lives students will read blogs, make comments on other people’s blogs or blog themselves, it is necessary that they learn how to use this media in a positive way.  (I often wish there were people screening comments on sites like YouTube.)  Facebook and twitter are a form of Microblogging (Wikipedia, 2013), which many students are already participating in.  This makes it all the more imperative they learn to leave a positive footprint on the World Wide Web.


The term Blog is short for Weblog and became part of mainstream media by 2004 (Wikipedia, 2013).  My daughter’s class has started blogging through Kidblog so I decided to look at its website.  Kidblog is a free blogging site made by teachers, for teachers.  With it they can create “safe and simple” blogs to use with their students, from K-12 (Kidblog, 2013).  According to the website, teachers can use Kidblog to teach their students how to be a good digital citizens, reflect on their learning, and practice their writing skills (Kidblog, 2013).  The teacher retains complete control over their students’ blogs, having the last say as to what gets published and what comments get posted.  Kidblog gives the teacher the flexibility to keep student blogs private (only classmates can view), to invite others to view the blogs (like parents or others in the school community), or make the blogs public (so anyone can view them) (Kidblog, 2013).  Kidblog has no advertising and does not require any personal information from students (Kidblog, 2013).  Kidblog seems like a great way to introduce students to the world of blogging.


My daughter’s class uses their blogs for “play”.  Beyond learning how to log in and create posts, students have not been given any further instruction, but are simply allowed to explore the medium on their own. As Kidblog allows a safe place to do this, letting them explore is not a bad idea, but student blogs can create more learning opportunities than this.  I wanted to take a screenshot of my daughter’s blog, but I couldn’t log in to the District server using Diigo browser on my iPad.  I assume this is a security feature or it doesn’t recognize the browser.  As I don’t have a class to start on Kidblog, I chose not to create a class account.  Instead I explored the Internet to see how other teachers are using blogs in their teaching practice.


A Grade 1 class is using Kidblog to follow Flat Stanley’s Adventures and another class has documented their trip to Argentina.  I found these two examples on the Twitter feed at Kidblog.  Another teacher tweeted there about how blogging has motivated her students to write.  A Google search elicited more ways teachers are using blogs with their students.  Check out Mrs. Yollis’ Wiki as she talks about how blogging has enhanced her students’ learning.  On Kidblog’s own blog there is a great 5-part interview with a teacher, Russ Goerend, from December 20, 2012, on how he uses Kidblog in his own classroom.  He has lots of tips on getting started, assessing work and teaching students how to comment.


I like the simplicity of Kidblog, as it is “important to not get distracted by the technology that powers the blogging platform” (Dunn, 2012).  According to Dunn blogging should be about reading and writing, not the technology.  Blogging provides students with authentic learning opportunities by enhancing student reading, writing and commenting on other’s work (Dunn, 2012).  From what I could find on the Internet, teachers see blogging as a way to enhance their students writing, therefore most of the examples I found were from Language Arts or English.  Though I didn’t find as many ways teachers are using blogging in Science classrooms, I think it would be a great tool in that subject as well.


Science writing (writing about science for non-specialists) and scientific writing (writing for specialists in the field) are different from other forms of writing (Writing@CSU, 2013).  A scientific paper has a standard 6-part format that guides readers to the information and analyses it contains (Writing@CSU, 2013).  When communicating their findings outside the scientific community, scientists must ensure they are writing in a clear and effective manner (MSTA).  Though not all students will become scientists, I believe it is still important for them to practice science writing.  By understanding good science or scientific writing, students will be better equipped to judge whether or not the “science” they find on the Internet is reliable.


I can see many opportunities for blogging in a Science 9 classroom.  An important part of scientific writing is the discussion of results from an experiment.  Often in a formal lab report students answer discussion questions and then write a brief conclusion.  Blogging could be a way to discuss the experiment in more depth and reflect on what the student learned.  This may help change the focus from “what did we do” to “why did we do it” and allow students to see science knowledge as more than a set of facts to be learned (Brownstein & Klein, 2006).  In the Science 9 Space Explorations unit, students could write biographies about astronauts, describe new space or spin-off technologies, or blog about anything that interests them about space.  Blogging would help foster community in the classroom, as students would learn what interests their fellow classmates have.  From my experience, science teachers often complain about their students’ writing.  They often don’t take the time write up their labs or other projects properly.  Because students know that a larger audience than their teacher will view their blogs, blogging has the added benefit of improving the quality of students’ writing (Brownstein& Klein, 2006).


I tried to find a few examples of blogs in the science classroom, but was not very successful.  I found quite a few science class blogs, but the posts seemed to be all from the teacher.  I also found blogs by science teachers indicating they use blogs in their classroom, but I couldn’t find any with student work.  Having students blog about the science they are learning may be underutilized in the classroom, however, I believe using Kidblog would have a lot of value for students and be another way for them to connect with the science they are studying.


Blog. (2013, March 9). In Wikipedia, The Free Encyclopedia. Retrieved 16:20, March 26, 2013, from http://en.wikipedia.org/w/index.php?title=Blog&oldid=542932272


Brownstein, E. and Klein, R. (2006). Blogs. National Science Teachers Association WebNews Digest. Retrieved from http://www.nsta.org/publications/news/story.aspx?id=51966


Dunn, J. (2012, December 24). [Web log message]. Retrieved from http://edudemic.com/2012/12/blogging-in-the-classroom-a-4-step-guide/


Kidblog (2013). Retrieved from http://kidblog.org/home/


MSTA-Michigan Science Teachers Association (n.d.). Writing Across the Curriculum: Science. Retrieved from http://www.michigan.gov/documents/mde/Science_WAC_2_3_264454_7.pdf


Writing@CSU (2013). Writing the scientific paper. Colorado State University. Retrieved from http://writing.colostate.edu/guides/guide.cfm?guideid=83


Leave a comment

Filed under LLED462

Evernote Keeps You Organized

Evernote is an organization tool that can be used by anyone, and after a workshop I attended in February, I can certainly see the value of Evernote to teachers.  At our District Professional Development day, I was able to attend a workshop hosted by a local teacher, Melissa Edstrom.  Melissa says she uses Evernote in her teaching practice daily: she stores webpages, lesson plans, worksheets, pictures, and basically anything she uses for her classroom (Edstrom, 2013).  She describes Evernote as replacing all her binders of “stuff” that every teacher seems to have and with it, she doesn’t have to worry about working in different rooms on different computers, or even at different schools because everything she needs is always with her, on all her devices (Edstrom, 2013).  Melissa finds the investment of $5 a month for a Premium account well worth it to keep herself organized (Edstrom, 2013).


According to the Evernote website, their tool is great for teachers to be able to “capture notes, organize lesson plans, collaborate on projects, snap photos of whiteboards and more” (Evernote, 2013).  It allows the user to create different notebooks to help keep everything organized.  New notes are easily created by, typing in text, importing PDF files, taking pictures, taking screenshots of webpages, or saving links (Edstrom, 2013).  Evernote has a text recognition feature so you can scan handwritten notes, take pictures of signs, pages in books etc. and be able to search within the text for information (Edstrom, 2013).  You can also invite individuals to view specific notes or notebooks to share information.


Evernote is free to download and use, but purchasing a Premium account for $5/month gives the user more upload capacity per month, offers greater sharing options, and no advertisements (Andrade). It can be downloaded to your computer or other device, or can simply be used from the Evernote website.  This is a nice feature as it means Evernote doesn’t have to be downloaded on all the computers in a school for students and teachers to be able to use it.  Everything is automatically synced.  I downloaded Evernote to my computer at home, but while at the Evernote workshop I used it online without downloading it to the school computer I was using.  The notes I took at the workshop were waiting for me when I got home.


The Evernote blog outlines numerous ways teachers and students can use its features.  I started using Evernote by creating notebooks for different subjects.  Notebooks can be stacked so you can have notebooks within notebooks.  For example I created the notebook Science 9.  Within this notebook I created notebooks for the different units (ex. Space Exploration, Life Sciences etc.).  I have been saving everything I created for this assignment using Web 2.0 tools to the Space Exploration notebook, which you can see here.  I can see this as a very useful tool for teacher-librarians.  Evernote allows a place to organize and save resources for different subjects that can be accessed from anywhere.  Evernote would allow me to take pictures and save them in Evernote (ex. Book I see in a bookstore, book displays I like, quotes, signs, etc.)  I can also save outlines of assignment teachers do in the library as well as any online resources I find for them.


At the Evernote workshop I attended, there were numerous teachers there attesting to the fact that they find Evernote very useful in their teaching practice.  As a TOC Evernote makes it easy to add to my “bag of tricks” that I can take to any class I may find myself in.  I am looking forward to exploring this Web 2.0 tool more and continue to learn how it can help me in my teaching practice.


Andrade, M. [Web log message]. Retrieved from http://educationaltechnologyguy.blogspot.ca/p/evernote-for-education.html


Edstrom, M. (2013, February). Evernote. CTA Professional Development Day, Port Coquitlam, BC.


Evernote. (2013). Evernote for teachers. Retrieved from http://evernote.com/teachers/

Leave a comment

Filed under LLED462

Mind Mapping: bubbles vs. popples

Concept maps, or mind maps, have been utilized in the classroom for years.  They are a type of graphic organizer that allows a student to manipulate information in a visual way (THWT, 2012).  Mind maps encourage creativity, improve memory retention and can be easier to understand than simple outlining (Web 2.0 Teaching Tools).  Although it is generally up to the student how to visually represent their learning of a topic, all concept maps have similar features.  The main topic is highlighted with branches of subtopics and details, all linked together to form a whole.  Creating concept maps in the classroom is very popular and it is little wonder they have gone Web 2.0.


I checked out a number of mind mapping sites listed on the Teaching History with Technology (THWT) website.  Unlike creating a concept map on paper where the student has control over the form their map will take, many of the online tools seem to have specific formats for creating mind maps.  The problem I had using these tools was trying to decide which one had the best format for the information I wanted to map.


I wanted to create a mind map on the topic of Galaxies.  I started with bubbl.us, as it is a good site for beginners (THWT, 2012).  Bubbl.us is a very simple tool to use and I liked it because there is no set format.  The user can create as many linked topics and subtopics as he/she would like.  The “bubbles” can be moved around easily and the font size and colour of each can be changed. Bubbl.us doesn’t require an account unless you want to save your work.  A free account only lets you create 3 mind maps, but to work around this the user can delete maps as they finish using them (Web 2.0 Teaching Tools).

Galaxies_27mcxqbh


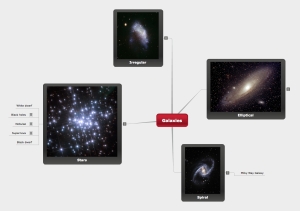
Mindomo is another mind mapping tool I tried.  With mindomo, users can choose images (or video) from the Internet (Google images, flickr etc.) to use in their mind map.  As well, the user can add notes to any topic or subtopic they want.  The notes are hidden and show up as an icon with the topic.  However, the format wasn’t as flexible as with bubbl.us and I wasn’t happy with the result.  I have included it here as part of the process I went through in trying to find a tool I really liked.


Galaxies


Both these tools were easy to use but I liked bubbl.us better except for the fact you can’t add images.  What I really wanted was a tool that combined the characteristics of both, and as I continued to search the Internet, I found one.


I found the mind mapping tool Popplet, on the Web 2.0 in Education (UK) website.  It looked like a tool that had all the things I was looking for: flexible format, ease of use, the ability to add pictures and videos, and being able to add as much or as little information as I wanted.  After watching a tutorial on Youtube, I decided to try it out.  Popplet is easy to use and very flexible in terms of style and format.  Pictures and videos can be added with text to go along with it.  The user can create as many “popples” as necessary to cover all the information to be mapped.  Text size and colour of popples can be changed and it is easy to add and link popples.  Popplet also allows for collaboration so a group or entire class can work on a mindmap together.  As well, there is a presentation feature allowing the creator to scroll through the popples similar to a PowerPoint presentation.  Popplet’s purpose is to provide a blank canvas with the tools to fill it, and offers an appealing option to support visual learners (Tomaszewski, 2012).  The free plan allows 5 popplets to be created or users can sign up for the monthly ($3/month) or yearly ($30/yr) plans for an unlimited number of popplets.  Teachers can sign up for Popplet Groups to purchase accounts for students.  Prices range from $2 for up to 50 subscriptions to $0.50 for over 1000 (Popplet, 2012).


Galaxies popplet


There are so many mind mapping tools available online, that the choice really depends on what the teacher decides is the purpose for the mind maps to be created by his/her students.  Bubbl.us is very simple, with a simple, flexible format.  Teachers can use bubbl.us to create mind maps to brainstorm a topic, as a pre- and post- topic assessment tool, to have students visually represent their work during the writing process, organize a story by theme, characters and setting plus many more (Web 2.0 Teaching Tools).  I can see using it to show links between main ideas, without a lot of detail being added.  Also it could be used to help illustrate cycles and pathways in chemistry and biology or even create timelines.  Popplet can be used for all of these ideas as well, however, because it allows the user to add much more detail (text and multimedia), I think it is best used as a presentation tool.  Students can create eye-catching mind maps with as much information as they want, which would be great for a large project or collaborative effort.  Because it is so flexible there is a chance students would spend more time than necessary creating something “pretty” to justify its use as a simple study aid, essay outline or chapter summary.


For creating a mind map, the best Web 2.0 tool to use depends on its purpose.  I think bubbl.us is an excellent tool to create traditional mind maps for students to organize information they have learned or are learning.  Popplet has a number of extra features that allows students to not only organize their ideas, but also create a visual presentation to showcase their learning.  Searching through the variety of mind mapping tools available on the Internet has made me realize that before choosing a tool a teacher needs to first decide the purpose of the product he/she wants the students to create.  This will determine the best tool for the job and ensure time is not wasted using one that doesn’t meet the needs of the students.  I think both bubble.us and popplet are both excellent tools for different purposes.  That is why I decided to include two tools for mind mapping for this assignment.


Bubbl.us (2013). Brainstorming made simple.  Retrieved from https://bubbl.us


Mindomo (2013). Mindmapping made easy.  Retrieved from http://www.mindomo.com


Popplet (2012). What is Popplet? Popplet is a place for your ideas.  Retrieved from http://popplet.com


THWT (Teaching History with Technology). (2012). Organizing with mindmaps. EdTechTeacher Inc. Retrieved from http://thwt.org/index.php/research/mindmapping


Tomaszewski J. (2012). Site review: Popplet. Education World. Retrieved from http://www.educationworld.com/a_curr/site-reviews/popplet.shtml


Web 2.0 in Education (UK). (2013) Mindmaps. Retrieved from http://web2educationuk.wetpaint.com/page/Mindmaps


Web 2.0 Teaching Tools (n.d.) Bubble.us: Brainstorming, Critical Thinking, Creativity. Retrieved from http://www.web2teachingtools.com/bubbl_us.html


Youtube (March 2012). Popplet Tutorial. Retrieved from http://www.youtube.com/watch?v=D624wGdcH14


Leave a comment

Filed under LLED462